
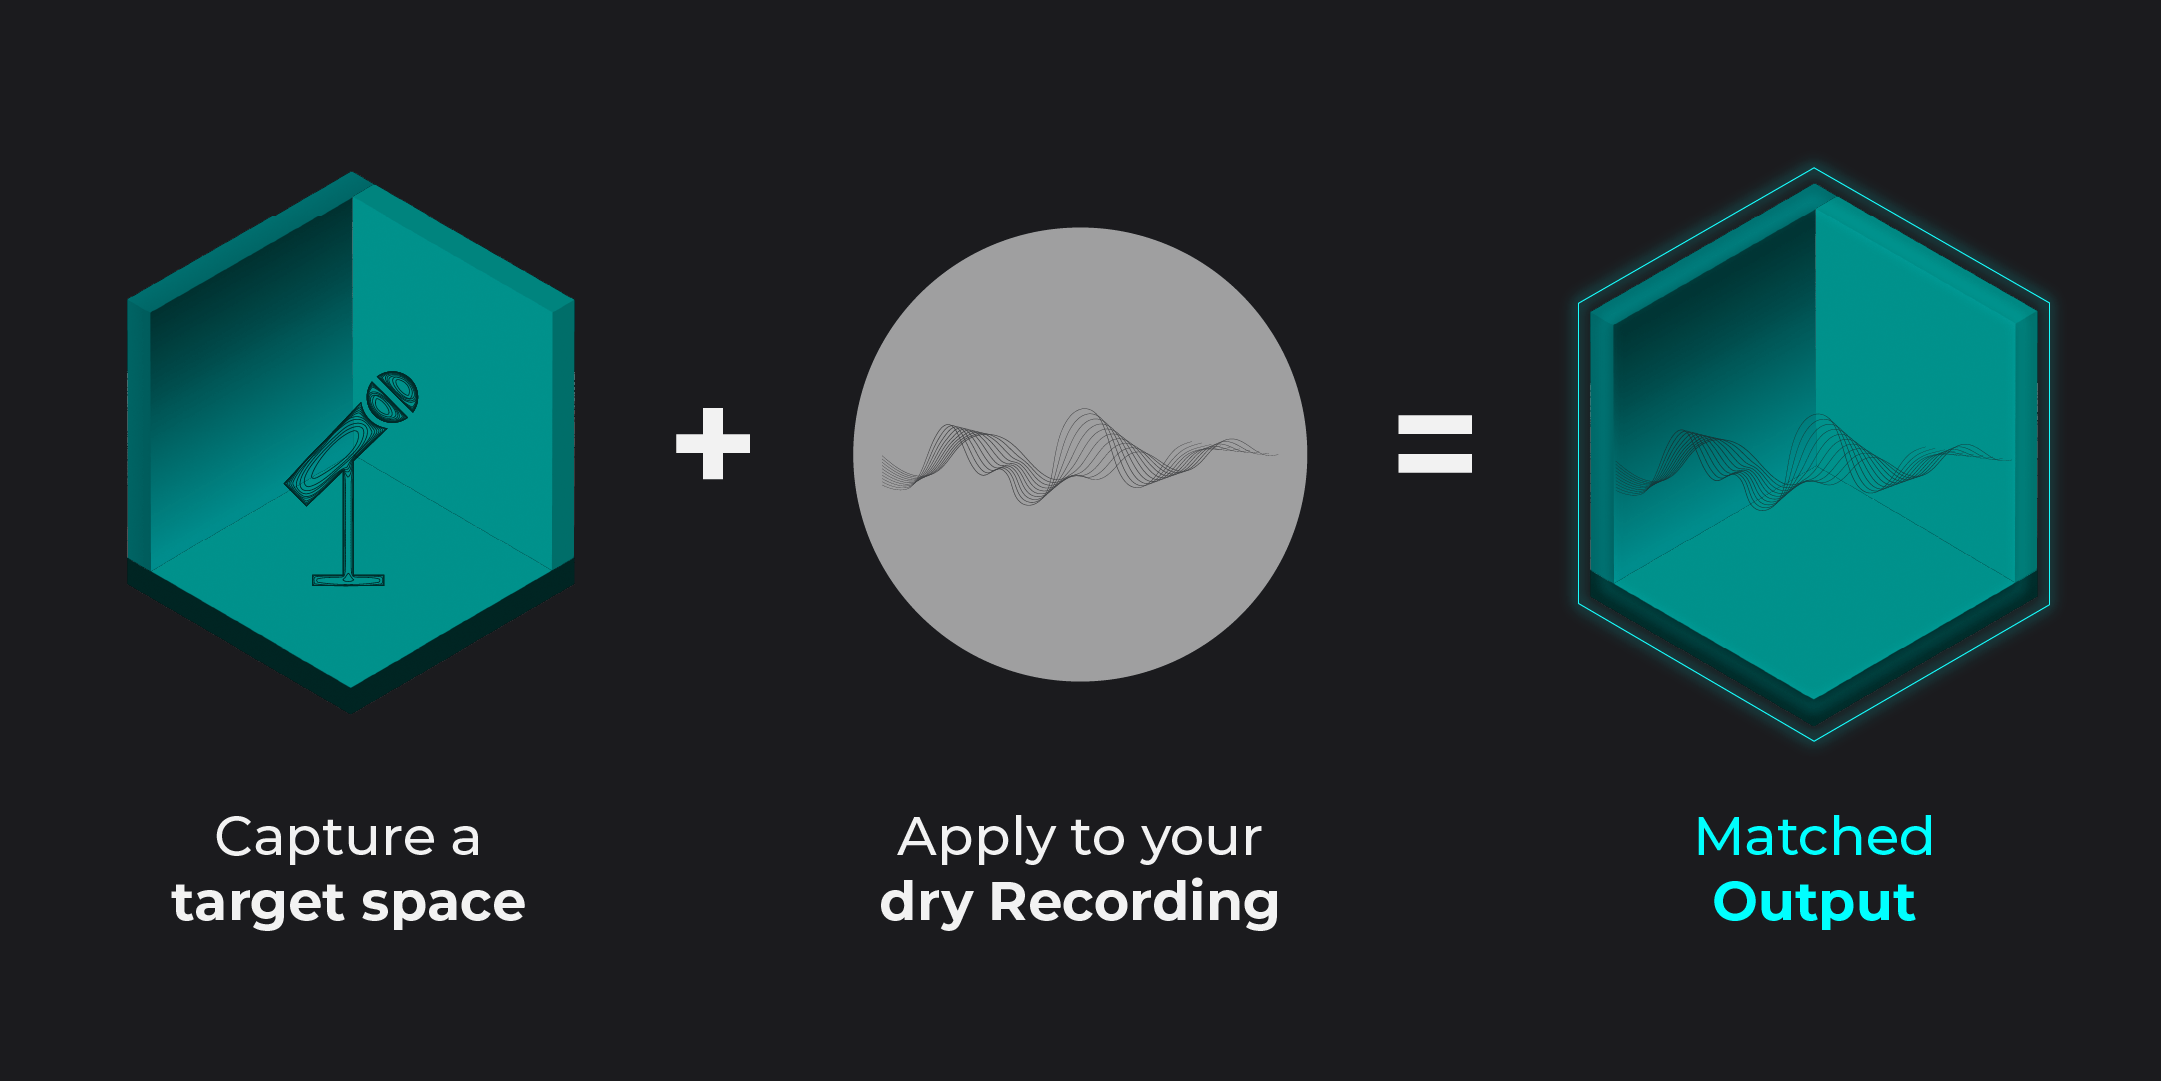
Previously, we’ve talked about removing reverb from audio. But how about the opposite? What if you could take the sound of a real room — a studio, a hallway, or even a cathedral — and apply it to your own recordings? That’s exactly what impulse responses and convolution reverb allow you to do.
In this guide, you’ll learn how to capture the acoustic fingerprint of a space and turn it into usable reverb that you can apply to your own audio.
What does “Creating Reverb from a Room” mean?
Every space has a unique acoustic signature. Playing a sound in a studio will cause a different echo than playing the same sound in a cathedral. When audio signals move across a room, they reflect off surfaces, creating a so called impulse response (IR).
The name says it all: An impulse response (IR) captures the response of a sound impulse that has been sent into an environment. It contains the acoustic footprint of a space, consisting of the impulse itself and its early and late reflections.
Think of it as a snapshot of how a room sounds.
You can use that IR in a convolution reverb to apply the spatial characteristics to any audio signal.
Step 1: Capture an Impulse Response
To recreate a real room, you first need to record its impulse response. To do this, you need to send an impulse into the desired room: a preferably short sound with a steep attack curve.
Method 1:
Balloon Pop (Simple)
If you’re rather curious about IRs and not in need of super clean results, try this method:
- Place your mic in the room
- Record a short, sharp sound (clap or balloon pop -> lager balloons tend to work better)
- Capture the full decay
Pros: Easy and fast
Cons: Noisy, less precise
Method 2:
Sine Sweep (Professional)
For optimal results, you want to capture as many frequencies as possible. A sine sweep is a sinus sound that evolves from low to high. Here’s what it sounds like:
- Download the sine sweep audio file
- Play it through a speaker
- Record it with a microphone
- Deconvolve the recording
Pros: Clean and accurate spectrum
Cons: Requires more setup and tools (you need a speaker that is powerful enough, especially in larger spaces)
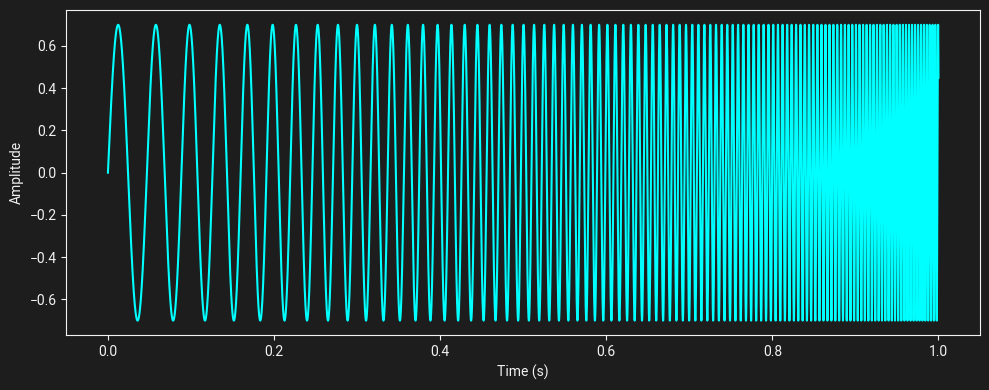
Visualization of a Sine Sweep over time, from the lowest to the highest frequency
Step 2: Clean and prepare the recording
Once you have your recording:
- Trim the start (remove silence before impulse)
- Reduce background noise if possible
- Normalize levels
The cleaner the recording, the better your resulting reverb.
Step 3: Load into a Convolution Reverb
Now take your impulse response and load it into a convolution reverb plugin.
This allows you to:
- Apply the captured room to any audio
- Adjust wet/dry balance
- Shape the decay
At this point, your dry studio recording should sound like it was recorded in that exact space.
Imitate Reverb in Seconds — Not Hours
Step 4: Apply to your Audio
Congratulations! You created your very own reverb effect. It can now be used like any other reverb in your library. These audio examples show what the process sounds like:
02
Foley
Your reference (underground)
Your dry Recording (Studio)
Chameleon Output
Limitations of Manual IR Creation
While this method usually works, it comes with some limitations and challenges:
- Requires access to the physical space
- Setup can be time-consuming
- Background noise affects quality
- Difficult to recreate rooms from existing recordings
Creating Reverb from existing Audio
In many real-world situations, you might have access to a reference, but not to the room it was recorded in. Or maybe the recording wasn’t originally created for reverb extraction.
Extracting a clean impulse response from such material manually is extremely difficult because:
- The signal is mixed with speech or music
- Reflections are not isolated
- Noise and processing interfere
A Smarter Approach
This is where tools like Chameleon come in.
Instead of requiring a clean impulse response recording, Chameleon can:
- Analyze any reference audio
- Extract its acoustic characteristics
- Turn it into a usable reverb
- Apply it to your own recordings
- generate reverb for surround formats
You can recreate a room even if you only have a finished recording of it.